HOW TO SETUP MAILCHIMP POPUP FORM (2020 updated)
What is subscription popup form
Subscription popup form is the most popular way to promote your newsletter subscription to your readers. It helps collect your readers’ email addresses so you could send out notification email to your subscribers whenever you have a new post published. If you’re using WordPress as your blogging platform, you’ll notice that WordPress does not offer popup window function. You need to create your own subscription popup form by using plugin and most of the time it involves some code editing just to get a decent looking popup. Today, we will go through the entire subscription box setup process without using plugin and without code editing by using Mailchimp.
How to set it up
1 ) First of all, you need to have a Mailchimp account and have a list created beforehand. The list is for storing your subscribers.
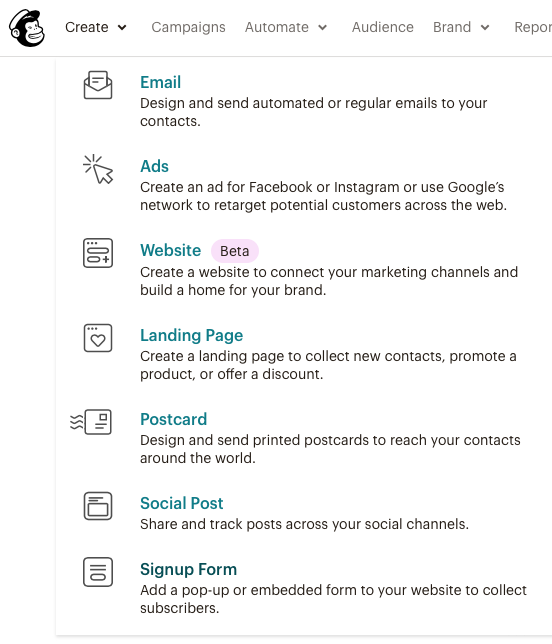
Click “Create” > “Signup Form”.
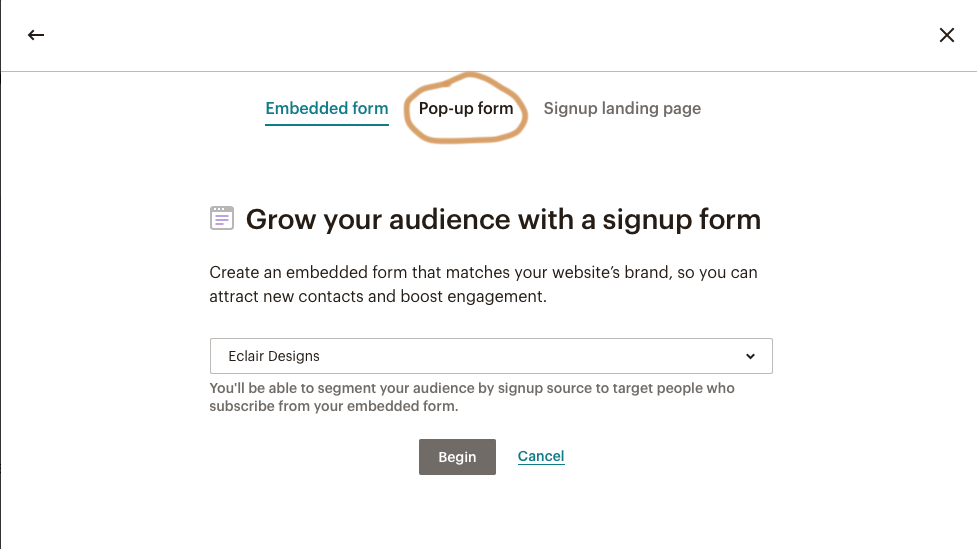
2 ) You will be prompted to another page > Select “Pop-up form“.
3 ) In the “Pop-up Form” editor:
A – It provides preview of the pop-up on desktop and mobile. Make sure you checked both before publishing your pop-up.
B – Upload a photo or your logo to this area. It’s optional.
C – There are three ways to display your pop-up. Modal is the most used format.
D – This defines when your pop-up going to be popped.
E – Where your photo align within the pop-up.
F – Font that use in the pop-up.
G – The text color of the pop-up.
H – Text that goes to the subscribe button.
I – The background color of the subscribe button.

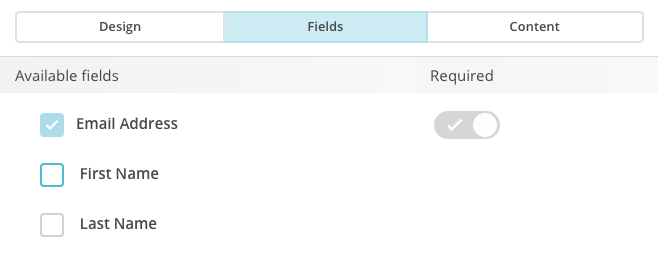
4 ) The field tab, you could insert two more fields to your subscription pop-up, the first name and the last name field. To save your readers time, email address field is more than enough.
5 ) The content field.
A – If the photo is cropped out, click the “edit” button in the content tab. It takes you to an online photo editor. You could resize, crop or even add effects to your photo.
B – The title of your subscription form popup.
C – This message will shows up once your reader has successfully complete the subscription process.
Once you’re happy with the design of your pop-up, you could then proceed to generate the pop-up form code. Click “Generate” button.

6 ) Copy the entire pop-up form code, go back to your WordPress dashboard > Appearance > Widgets > Drag a text widget to the sidebar or footer widget area and paste the pop-up form code to text tab of the widget. That’s it!
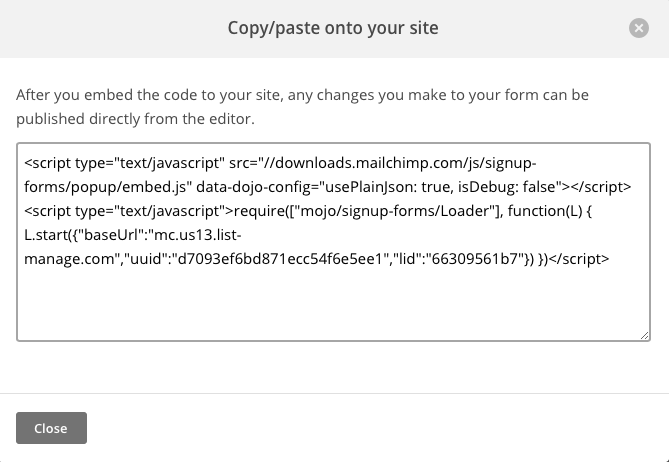
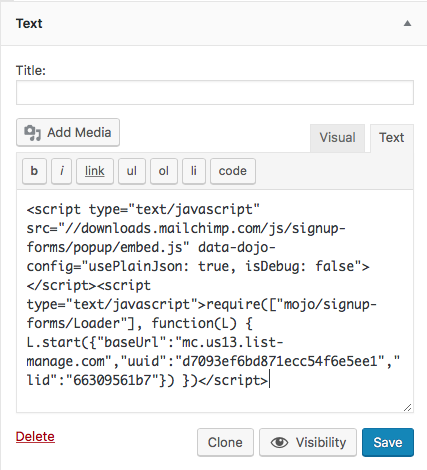
If you don’t see the pop-up, try clear the history and cookie of your web browser and refresh the page.
 HOW TO ADD GOOGLE ADSENSE TO YOUR WORDPRESS BLOG
 ADD AND CHANGE FONTS WITHOUT PLUGIN (UPDATED)
 ADD E-COMMERCE TO YOUR WORDPRESS
 INSTALL PINTEREST PIN IT/SAVE BUTTON + FREE DOWNLOAD